 Sofia Jones
5 Mistakes Beginners Make with Their First Full Lace Frontal (And How to Fix Them)
Bisnis | 2026-08-03 15:38:57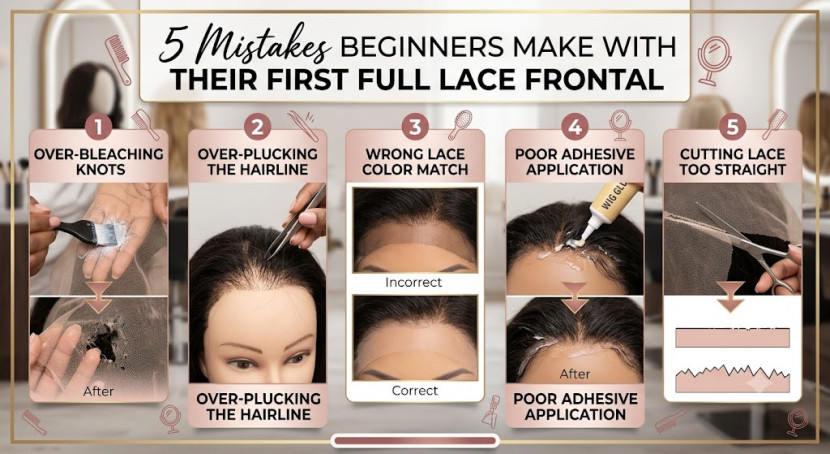
There is nothing quite like the feeling of installing your first full lace frontal. When done correctly, a quality lace frontal gives you the ultimate styling versatility—delivering an undetectable hairline that looks as though the strands are growing straight out of your scalp. From sleek high ponytails to deep side parts, a full lace frontal opens up endless possibilities that traditional leave-outs simply cannot match.
However, transitioning to a frontal hair system comes with a learning curve. Because lace materials are delicate and require precise customization, a single wrong move can take your install from "effortless scalp" to noticeably artificial. Many beginners end up damaging expensive human hair pieces, irritating their edges, or struggling with lace lifting within just a few days.
If you are feeling overwhelmed, do not panic. Every hair enthusiast has made a few novice errors along the way. In this comprehensive guide, you will learn the five most common mistakes beginners make with their first frontal install—along with step-by-step solutions to help you achieve a flawless, long-lasting slay.

What Is a Full Lace Frontal and Why Is Customization Necessary?
Before diving into the mistakes, it is essential to understand what makes a full lace frontal unique. Unlike a standard closure that only covers a small square portion of the crown, a frontal spans from ear to ear (typically sized 13x4 or 13x6 inches). This wide lace foundation mimics your entire natural hairline.
While some people opt for a full 360 lace frontal wig for complete perimeter coverage or a traditional frontal sew in attached to natural braids, the core component remains the same: sheer Swiss or HD lace with individual hair strands hand-tied into small knots. Because manufacturers design these pieces with dense, uniform hairlines to fit a variety of head shapes, you must customize the frontal to match your unique forehead shape, skin tone, and hair density. Skipping or rushing these customization steps leads directly to the most frequent beginner blunders.
Mistake 1: Over-Bleaching the Knots
To make hair strands appear as if they are sprouting naturally from the scalp, the dark knots at the base of the lace need to be lightened using bleach. However, over-bleaching is the single fastest way to ruin a brand-new full lace frontal.
Why It Happens
Beginners often leave the bleach mixture on too long or mix it into a runny consistency. When the bleach is too thin, it seeps past the knots and penetrates the root of the hair shafts, creating brassy, orange-yellow roots—a flaw known in the hair community as "hot roots." Worse, over-processed bleach degrades the lace netting and chemical bonds, causing severe shedding and balding patches.
How to Fix It
- Mix a Thick Consistency: Your bleach mixture should resemble thick mashed potatoes, not runny pancake batter. This prevents the chemical from falling through the lace holes onto the hair shafts.
- Apply with a Light Hand: Gently dab the bleach onto the grid using a tint brush. Do not press or smear the bleach into the lace.
- Monitor the Timer: Keep a close eye on the lifting process, usually between 15 to 25 minutes depending on the developer strength (a 20-volume developer is safest for beginners).
- Tone Immediately: Neutralize any leftover brassiness with purple shampoo or a dedicated brass-relieving toner immediately after rinsing out the bleach.
Mistake 2: Aggressive or Over-Plucking the Hairline
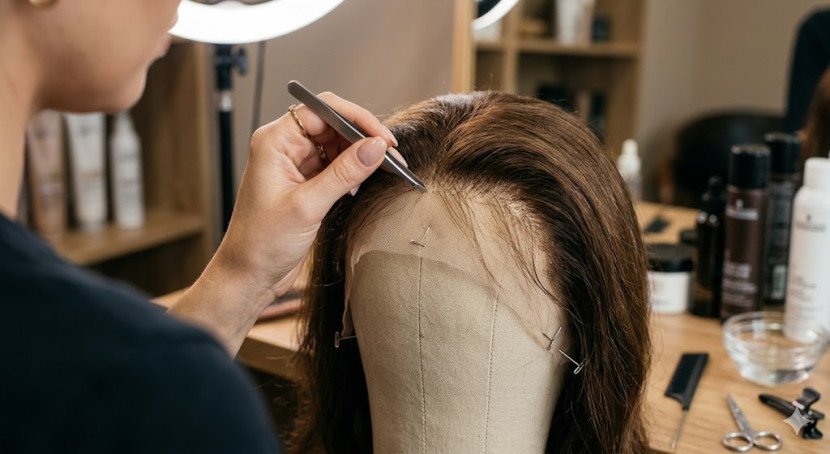
Natural hairlines are soft, irregular, and slightly sparse at the front. Out of the package, a factory lace frontal features a dense, straight wall of hair. Plucking removes excess density to build a realistic gradient, but going overboard can ruin the entire unit.
Why It Happens
Plucking requires patience. Beginners often pluck continuously in one spot or use excessive force, pulling out too many strands at once. This results in artificial gaps, jagged hairline holes, or a hairline that recedes too far back.
How to Fix It
- Pluck in Sections: Always work on damp hair with a small amount of holding mousse applied to smooth the strands back.
- Use Quality Tweezers: Invest in sharp, slanted tweezers designed for precision work.
- Follow the "Space Out" Method: Pluck every third or fourth strand rather than pulling adjacent hairs. Move your tweezers constantly across the hairline instead of staying in one section.
- Step Back and Test: Frequently brush the hair back and hold the lace against your forehead to evaluate your progress under natural light before plucking more.
Mistake 3: Cutting the Lace in a Straight Line
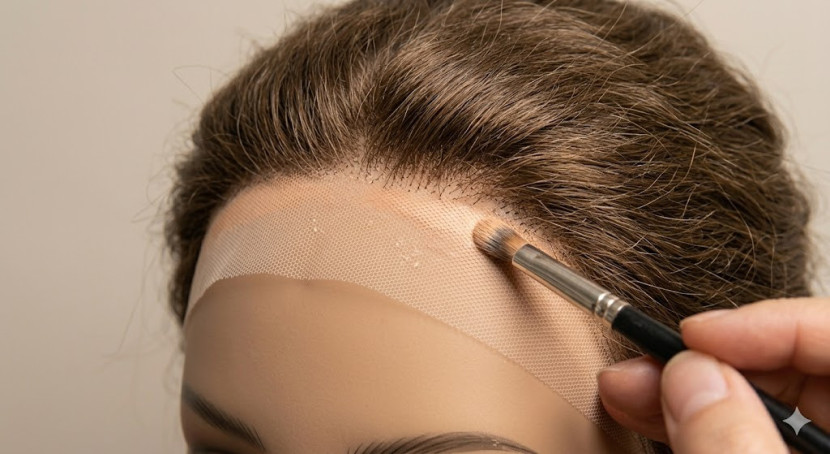
Once your piece is prepped, you must cut away the excess sheer lace extending past the hairline. A surprisingly common rookie mistake is trimming this extra material in a single, rigid, straight line across the forehead.
Why It Happens
Cutting a straight line seems like the most logical, straightforward approach. However, human foreheads are rounded, naturally uneven, and full of subtle contours. A straight edge creates a visible harsh border that catches the light and makes the lace stand out.
How to Fix It
- Cut in Jagged, Zig-Zag Lines: Use small shears (such as eyebrow scissors) to trim the lace using tiny, subtle zig-zag motions. This creates an organic border that melts seamlessly into the skin.
- Cut in Sections: Divide the frontal into three or four manageable sections (middle, left temple, right temple) before trimming. This gives you far greater control over the shape.
- Leave a Tiny Border: Do not cut right up against the hair follicles. Leave roughly 1 to 2 millimeters of lace ahead of the hairline to allow secure adhesion without pulling on the delicate front strands.
Mistake 4: Choosing the Wrong Adhesive or Skipping Skin Prep
Whether you are opting for a temporary liquid gel application, a heavy-duty skin adhesive, or securing a 360 lace frontal wig, proper skin prep and glue selection are critical.
Why It Happens
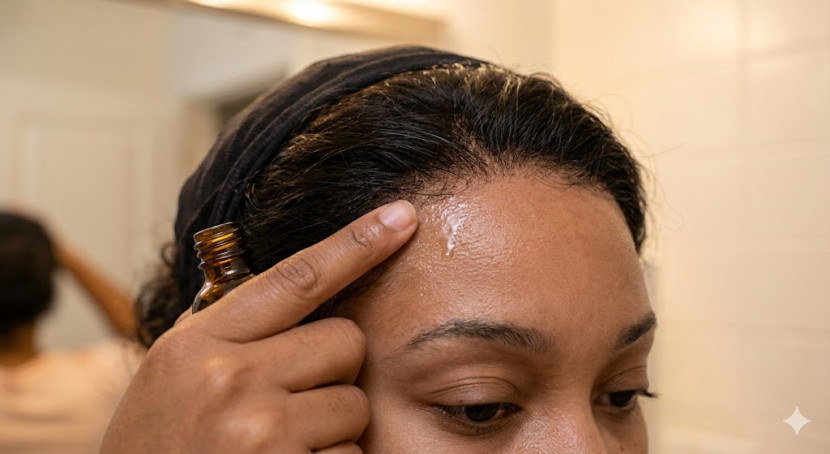
Many beginners apply adhesive directly onto skin that still contains natural face oils, moisturizer, or makeup. Others rush the drying phase, applying the lace into wet, white glue rather than waiting for the adhesive to turn completely clear and tacky.
How to Fix It
- Cleanse Thoroughly: Always wipe down your forehead and hairline with 90% isopropyl alcohol to remove oil, sweat, and makeup residue before applying any holding product.
- Protect Your Skin and Edges: Apply a generous layer of scalp protector or skin barrier spray to guard against irritation and prevent glue from soaking into your natural edges.
- Wait for the Glue to Turn Clear: If using specialized lace glue, apply 2 to 4 thin layers, allowing each layer to dry until it is completely transparent and tacky to the touch before adding the next. Never press lace onto white, wet glue.
- Melt with an Elastic Band: Once the lace is positioned, tie a stretchy melting band securely over the hairline for 10 to 15 minutes to set the bond in place.
Mistake 5: Neglecting Daily Maintenance and Nightcare
You have customized your piece, cut the lace, and achieved a seamless melt. The work does not stop there! Neglecting daily up-keep will drastically shorten the lifespan of your frontal sew in or wig unit.
Why It Happens
It is easy to forget that human hair extensions do not receive natural oils from your scalp. Sleeping directly on cotton pillowcases, exposing the lace to excessive moisture without protection, or using heavy, greasy oils will loosen the adhesive bond and dry out the hair.
How to Fix It
- Wrap It Up at Night: Never go to sleep without securing your perimeter. Tie down your frontal using a satin or silk edge scarf, and cover the rest of the hair with a bonnet.
- Minimize Heavy Products: Avoid applying heavy oils or greasy pomades directly on or near the lace, as oil actively breaks down lace adhesives. Use lightweight alcohol-free mousses for styling instead.
- Comb from Ends to Roots: Always detangle your frontal gently starting from the ends and moving upward toward the roots using a wide-tooth comb or paddle brush to prevent tension on the delicate lace knots.
Quick Reference: Pros & Cons of a Full Lace Frontal
Understanding the trade-offs of choosing a full lace piece can help you manage expectations and adjust your daily routine accordingly.
Pros
- Unmatched Realism: Gives the illusion of natural hair growth across the entire front hairline.
- Styling Freedom: Allows for versatile styling options including half-up styles, deep side parts, and sleek braids.
- Comfort and Breathability: High-quality Swiss or HD lace is thin, lightweight, and allows your scalp to breathe better than thick fabric caps.
Cons
- High Maintenance: Requires consistent customization, delicate handling, and regular touch-ups.
- Fragile Foundation: Delicate lace netting can tear easily if combed too aggressively or over-processed with bleach.
- Initial Cost & Effort: Good quality human hair frontals represent a higher upfront financial and time investment compared to standard closures.
Frequently Asked Questions (FAQs)
How long does a full lace frontal install usually last?
A professionally applied frontal install typically lasts between 2 to 3 weeks before needing a touch-up or re-installation. How long your melt lasts depends on your skin type (oily skin breaks down glue faster), your activity level, and how well you protect the hairline while sleeping or showering.
Can I install a lace frontal without using glue?
Yes! You can achieve a glueless install using specialized holding mousses, melting sprays, or by installing an adjustable elastic band inside your wig cap. Glueless methods are ideal for beginners because they are gentle on natural edges and easy to remove daily.
What is the main difference between a lace frontal and a 360 lace frontal wig?
A standard lace frontal covers only the front perimeter from ear to ear (13x4 or 13x6 inches). A 360 lace frontal wig has lace extending around the entire perimeter of your head (front, sides, and nape of the neck), allowing you to wear high ponytails and up-dos while keeping the middle section constructed with traditional wig tracks.
Final Thoughts
Mastering your first full lace frontal is a rewarding journey that gets easier with time and practice. By avoiding these five fundamental mistakes—bleaching responsibly, plucking with patience, trimming irregular edges, prepping your skin properly, and committing to nightly care—you can achieve a natural, seamless look while protecting both your investment piece and your natural hairline. Take your time during the prep stage, practice proper techniques, and enjoy the confidence of a flawless hair transformation!
Disclaimer
Retizen adalah Blog Republika Netizen untuk menyampaikan gagasan, informasi, dan pemikiran terkait berbagai hal. Semua pengisi Blog Retizen atau Retizener bertanggung jawab penuh atas isi, foto, gambar, video, dan grafik yang dibuat dan dipublished di Blog Retizen. Retizener dalam menulis konten harus memenuhi kaidah dan hukum yang berlaku (UU Pers, UU ITE, dan KUHP). Konten yang ditulis juga harus memenuhi prinsip Jurnalistik meliputi faktual, valid, verifikasi, cek dan ricek serta kredibel.